Tạo một namespace cung cấp thêm một lớp cách ly để dễ kiểm soát hơn đối với môi trường CICD. Tạo namespace cho việc triển khai Jenkins bằng cách nhập lệnh sau.
$ kubectl create namespace jenkins
namespace/jenkins created
Khi namespace đã được tạo, bạn có thể xác minh trạng thái của nó bằng cách nhập
$ kubectl get namespaces
NAME              STATUS   AGE
default           Active   9m17s
jenkins           Active   47s
kube-node-lease   Active   9m20s
kube-public       Active   9m20s
kube-system       Active   9m20s
Tiếp theo mình sẽ sử dụng helm để cài đặt Jenkins, nếu bạn chưa cài helm thì bạn hãy xem lại các bài trước và cài helm vào nhé
Sau khi Helm được cài đặt và thiết lập đúng cách, hãy thêm Jenkins repo như sau:
$ helm repo add jenkinsci https://charts.jenkins.io
"jenkinsci" has been added to your repositories
Cập nhật lại repo helm
$ helm repo update
Hang tight while we grab the latest from your chart repositories...
...Successfully got an update from the "jenkinsci" chart repository
Update Complete. ⎈Happy Helming!⎈
Có thể kiểm tra lại bằng cách liệt kê các chart có trong repo Jenkins bằng lệnh:
$ helm search repo jenkinsci
NAME                    CHART VERSION   APP VERSION     DESCRIPTION
jenkinsci/jenkins       4.2.8           2.361.1         Jenkins - Build great things at any scale! The ...
Tải file jenkins-volume.yaml
$ wget https://wiki.hoanghd.com/wp-content/uploads/codes/k8s-jenkins/jenkins-volume.yamlNếu bạn không muốn thay đổi gì thì tiến hành triển khai jenkins-volume.yaml
$ kubectl apply -f ./jenkins-volume.yaml
persistentvolume/jenkins-pv created
Tạo thư mục cho Persistent Volumes lưu data của Jenkins mà ta đã khai báo ở file jenkins-volume.yaml
$ mkdir -p /data/jenkins-volumePhân quyền cho nó
$ sudo chown -R 1000:1000 /data/jenkins-volumeFile jenkins-sa.yaml sẽ tạo một file giúp chuyển nó làm đối số cho Helm CLI và được sử dụng ở file jenkins-values.yaml mà mình sẽ tạo ở bước sau.
Ta triển khai file jenkins-sa.yaml
$ kubectl apply -f https://wiki.hoanghd.com/wp-content/uploads/codes/k8s-jenkins/jenkins-sa.yaml
serviceaccount/jenkins created
Tải file jenkins-values.yaml về.
$ wget -O jenkins-values.yaml https://wiki.hoanghd.com/wp-content/uploads/codes/k8s-jenkins/jenkins-values.yaml
--2022-10-05 10:21:42--  https://wiki.hoanghd.com/wp-content/uploads/codes/k8s-jenkins/jenkins-values.yaml
Resolving hoanghd.fun (hoanghd.fun)... 103.138.89.223
Connecting to hoanghd.fun (hoanghd.fun)|103.138.89.223|:443... connected.
HTTP request sent, awaiting response... 200 OK
Length: 38860 (38K)
Saving to: ‘jenkins-values.yaml’

jenkins-values.yaml                                    100%[=========================================================================================================================>]  37.95K  --.-KB/s    in 0.004s

2022-10-05 10:21:42 (9.46 MB/s) - ‘jenkins-values.yaml’ saved [38860/38860]
Mở jenkins-values.yaml và sửa đổi những điều sau:
Do mình đang chạy 1 node nên mình cần sử dụng NodePort làm loại dịch vụ. Chỉ các nhà cung cấp cloud mới cung cấp bộ cân bằng tải hoặc bạn phải tự deploy 1 bộ cân bằng tải, ví dụ như Nginx Ingress.
- Truyền vào storageClass bằng tên Persistent Volumes mà mình đã truyền ở trên.
$ storageClass: jenkins-pv- Chỉnh sửa phần serviceAccount như nội dung ở dưới
serviceAccount:
  create: false
# Service account name is autogenerated by default
name: jenkins
annotations: {}- Chỉnh sửa serviceType: ClusterIP sang serviceType: NodePort
$ serviceType: NodePortỞ link đính kèm mình đã chỉnh toàn bộ nên bạn không cần phải chỉnh lại
Và bây giờ bạn có thể cài đặt Jenkins bằng cách chạy helm install và truyền vào các đối số như dưới
$ helm install jenkins -n jenkins -f jenkins-values.yaml jenkinsci/jenkins
NAME: jenkins
LAST DEPLOYED: Wed Oct  5 10:27:59 2022
NAMESPACE: jenkins
STATUS: deployed
REVISION: 1
NOTES:
Nếu triển khai thành công thì đầu ra sẽ xuất hiện thêm quy trình các bước bạn sẽ phải làm ở phần tiếp theo.
1. Get your 'admin' user password by running:
  kubectl exec --namespace jenkins -it svc/jenkins -c jenkins -- /bin/cat /run/secrets/additional/chart-admin-password && echo
2. Get the Jenkins URL to visit by running these commands in the same shell:
  export NODE_PORT=$(kubectl get --namespace jenkins -o jsonpath="{.spec.ports[0].nodePort}" services jenkins)
  export NODE_IP=$(kubectl get nodes --namespace jenkins -o jsonpath="{.items[0].status.addresses[0].address}")
  echo http://$NODE_IP:$NODE_PORT/login

3. Login with the password from step 1 and the username: admin
4. Configure security realm and authorization strategy
5. Use Jenkins Configuration as Code by specifying configScripts in your values.yaml file, see documentation: http:///configuration-as-code and examples: https://github.com/jenkinsci/configuration-as-code-plugin/tree/master/demos

For more information on running Jenkins on Kubernetes, visit:
https://cloud.google.com/solutions/jenkins-on-container-engine

For more information about Jenkins Configuration as Code, visit:
https://jenkins.io/projects/jcasc/


NOTE: Consider using a custom image with pre-installed plugins
Chờ đợi 1 lát chúng nha có kết quả
$ kubectl get pod,svc -n jenkins
NAME            READY   STATUS    RESTARTS   AGE
pod/jenkins-0   2/2     Running   0          6m6s

NAME                    TYPE        CLUSTER-IP      EXTERNAL-IP   PORT(S)          AGE
service/jenkins         NodePort    10.109.150.33   <none>        8080:30537/TCP   6m6s
service/jenkins-agent   ClusterIP   10.111.126.22   <none>        50000/TCP        6m6s
Để lấy mật khẩu của admin, bạn chạy các lệnh dưới
jsonpath="{.data.jenkins-admin-password}"
secret=$(kubectl get secret -n jenkins jenkins -o jsonpath=$jsonpath)
echo $(echo $secret | base64 --decode)
Ở lệnh cuối cùng bạn sẽ nhận được mật khẩu như dưới
$ echo $(echo $secret | base64 --decode)
7T4xxrRGoD05SDB5W9NMn5
Để nhận url để truy cập Jenkins, bạn chạy các lệnh sau
jsonpath="{.spec.ports[0].nodePort}"
NODE_PORT=$(kubectl get -n jenkins -o jsonpath=$jsonpath services jenkins)
jsonpath="{.items[0].status.addresses[0].address}"
NODE_IP=$(kubectl get nodes -n jenkins -o jsonpath=$jsonpath)
echo http://$NODE_IP:$NODE_PORT/login
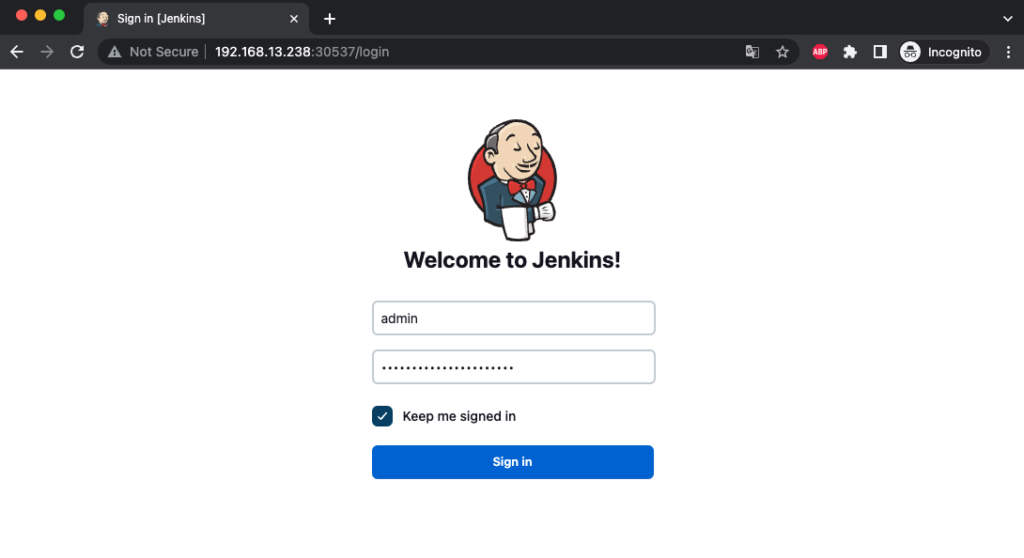
Ở lệnh cuối, bạn sẽ nhận được url và tiến hành dùng trình duyệt để truy cập vào trang quản trị Jenkins
$ echo http://$NODE_IP:$NODE_PORT/login
http://192.168.13.238:30537/login
Đây là trang quản trị Jenkins, bạn hãy sử dụng mật khẩu lúc nãy đã lấy ở phần trên và tiến hành login vào Jenkins

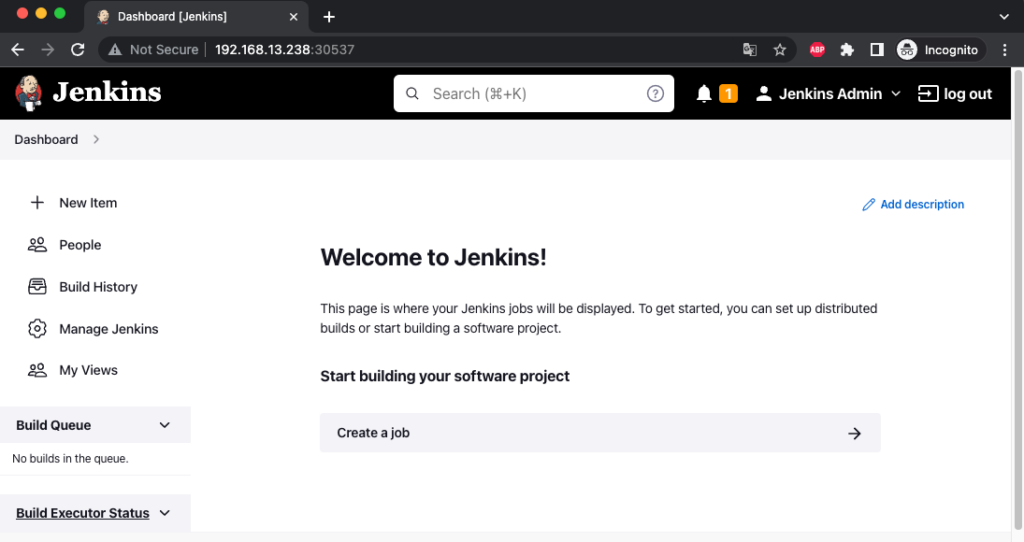
Và đây là kết quả cuối cùng.

Tham khảo: https://www.jenkins.io/doc/book/installing/kubernetes/
