Giời thiệu.
Prometheus là một toolkit mã nguồn mở mạnh mẽ cho việc theo dõi và cảnh báo hệ thống. Với Prometheus, bạn có khả năng quản lý hiệu quả hệ thống Docker của mình. Bài viết này sẽ hướng dẫn bạn cách cấu hình Docker để nó trở thành một mục tiêu cho Prometheus, sau đó thiết lập Prometheus để chạy dưới dạng một container Docker để theo dõi hệ thống Docker của bạn.

Yêu cầu bạn cần cài đặt sẵn Docker và có kết nối Internet để kéo image Prometheus về.
Lưu ý:
- Thông tin về các chỉ số Prometheus và tên của các chỉ số đang trong quá trình phát triển và có thể thay đổi bất cứ lúc nào.
- Hiện tại, bạn chỉ có thể theo dõi Docker chính mình. Hiện tại, bạn không thể theo dõi ứng dụng của bạn bằng mục tiêu Docker.
Cấu hình Docker.
Để cấu hình Docker daemon là một mục tiêu Prometheus, bạn cần chỉ định địa chỉ metrics. Cách tốt nhất để thực hiện điều này là thông qua file daemon.json, mà mặc định nằm ở một trong các file sau đây. Nếu file không tồn tại, hãy tạo nó.
- Trên Linux:
/etc/docker/daemon.json - Trên Windows Server:
C:\ProgramData\docker\config\daemon.json - Docker Desktop for Mac/Docker Desktop for Windows: Bấm vào biểu tượng Docker trong thanh công cụ, chọn Settings, sau đó chọn Docker Engine.
Nếu file hiện tại trống rỗng, hãy dán nội dung sau:
{
  "metrics-addr" : "192.168.13.191:9323"
}
Nếu file không rỗng, hãy thêm khóa mới, đảm bảo rằng file kết quả là JSON hợp lệ. Hãy cẩn thận rằng mỗi dòng kết thúc bằng dấu phẩy (,) ngoại trừ dòng cuối cùng.
Ví dụ.
{
  "insecure-registries" : ["192.168.13.191:5000"],
  "metrics-addr" : "192.168.13.191:9323"
}
Lưu file hoặc trong trường hợp của Docker Desktop for Mac hoặc Docker Desktop for Windows, lưu cấu hình.
Khởi động lại Docker.
sudo systemctl restart dockerDocker hiện nay sẽ tương thích với Prometheus trên cổng 9323 nên sau khi khởi động lại Docker bạn phải đảm bảo port 9323 đã listen.
$ netstat -tlnp | grep 9323
tcp        0      0 192.168.13.191:9323     0.0.0.0:*               LISTEN      99917/dockerd
Cấu hình và chạy Prometheus.
Sao chép file cấu hình sau và lưu vào một vị trí tùy chọn, ví dụ /home/monitoring/prometheus.yml. Đây là một file cấu hình Prometheus mẫu, ngoại trừ phần định nghĩa công việc Docker ở cuối file.
Mình sẽ tạo thư mục làm việc /home/monitoring trước.
mkdir -p /home/monitoringTiếp theo hay tạo thư file cấu hình prometheus.yml, nhớ thay đổi thông tin cho phù hợp với hệ thống của bạn, ví dụ của mình Docker Host có IP là 192.168.13.191.
cat > /home/monitoring/prometheus.yml << 'OEF'
# my global config
global:
  scrape_interval:     15s # Set the scrape interval to every 15 seconds. Default is every 1 minute.
  evaluation_interval: 15s # Evaluate rules every 15 seconds. The default is every 1 minute.
  # scrape_timeout is set to the global default (10s).

  # Attach these labels to any time series or alerts when communicating with
  # external systems (federation, remote storage, Alertmanager).
  external_labels:
      monitor: 'codelab-monitor'

# Load rules once and periodically evaluate them according to the global 'evaluation_interval'.
rule_files:
  # - "first.rules"
  # - "second.rules"

# A scrape configuration containing exactly one endpoint to scrape:
# Here it's Prometheus itself.
scrape_configs:
  # The job name is added as a label `job=<job_name>` to any timeseries scraped from this config.
  - job_name: 'prometheus'

    # metrics_path defaults to '/metrics'
    # scheme defaults to 'http'.

    static_configs:
      - targets: ['192.168.13.191:9090']

  - job_name: 'docker'
         # metrics_path defaults to '/metrics'
         # scheme defaults to 'http'.

    static_configs:
      - targets: ['192.168.13.191:9323']
OEF
Tiếp theo cũng tại thư mục /home/monitoring mình tạo file docker-compose.yml.
cat > /home/monitoring/docker-compose.yml << 'OEF'
version: '3'

services:
  prometheus:
    image: prom/prometheus
    volumes:
      - ./prometheus.yml:/etc/prometheus/prometheus.yml
    ports:
      - "9090:9090"
OEF
Bây giờ sử dụng lệnh docker compose để khởi chạy container.
$ docker-compose up -d
[+] Running 2/2
 ⠿ Network monitoring_default         Created                                                                                                                                            0.1s
 ⠿ Container monitoring-prometheus-1  Started                                                                                                                                            0.6s
Xác nhận container đã chạy thành công.
$ docker ps
CONTAINER ID   IMAGE                                 COMMAND                  CREATED          STATUS          PORTS                                       NAMES
134399d9a777   prom/prometheus                       "/bin/prometheus --c…"   11 minutes ago   Up 11 minutes   0.0.0.0:9090->9090/tcp, :::9090->9090/tcp   monitoring-prometheus-1
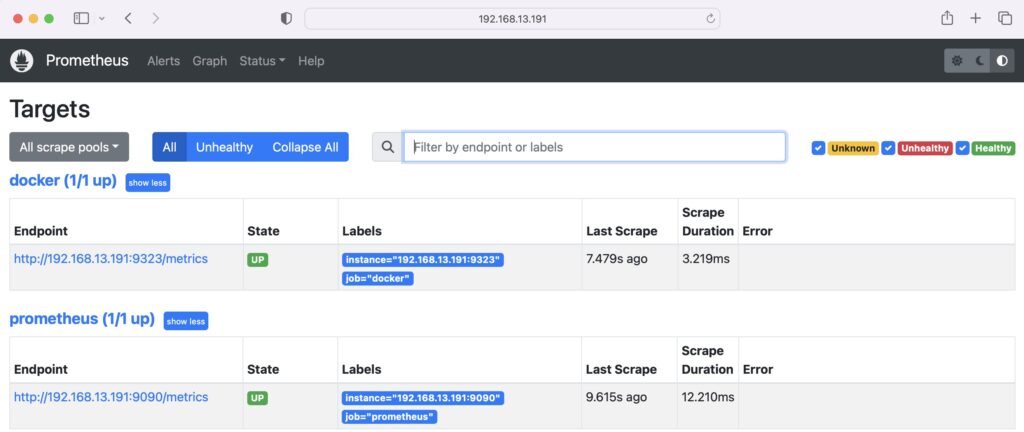
Như vậy sau khi bạn đã cấu hình và chạy Prometheus, bạn nên xác minh rằng mục tiêu Docker của bạn được liệt kê trong Prometheus. Điều này giúp bạn đảm bảo rằng Prometheus đang thu thập thông tin theo dõi từ Docker thành công.
Xác minh rằng mục tiêu Docker được liệt kê tại http://192.168.13.191:9090/targets/.

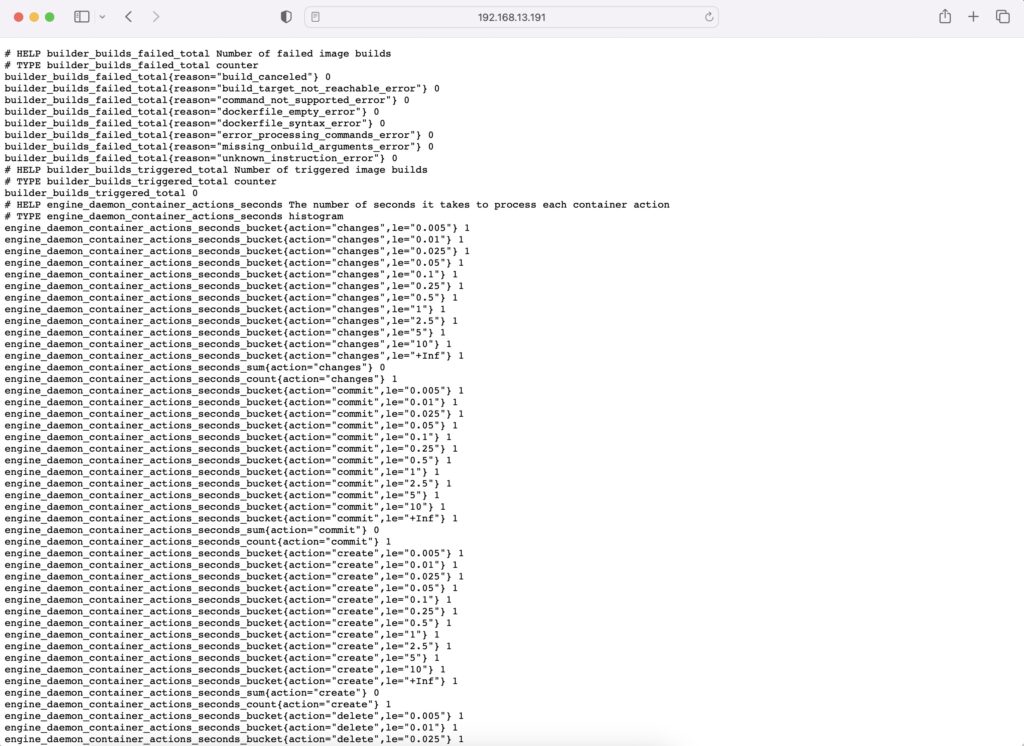
Bạn có thể truy cập http://192.168.13.191:9323/metrics để xem metrics.

Kết luận.
Trong bài viết này, mình đã hướng dẫn bạn cách cấu hình Docker để nó trở thành một mục tiêu cho Prometheus và sau đó thiết lập Prometheus để theo dõi hệ thống Docker của bạn. Bằng cách làm điều này, bạn có khả năng tận dụng sức mạnh của Prometheus để theo dõi và quản lý hệ thống Docker của mình một cách hiệu quả.
