Tổng quan.
Giả sử chúng ta có 1 server chạy ảo hóa Esxi, vì lý do nào đó chúng ta quên mất pass root. Hôm nay mình sẽ giúp các bạn cách khắc phục sự cố này.

Các bước thực hiện.
Download gparted-live-1.4.0-1-i686.iso
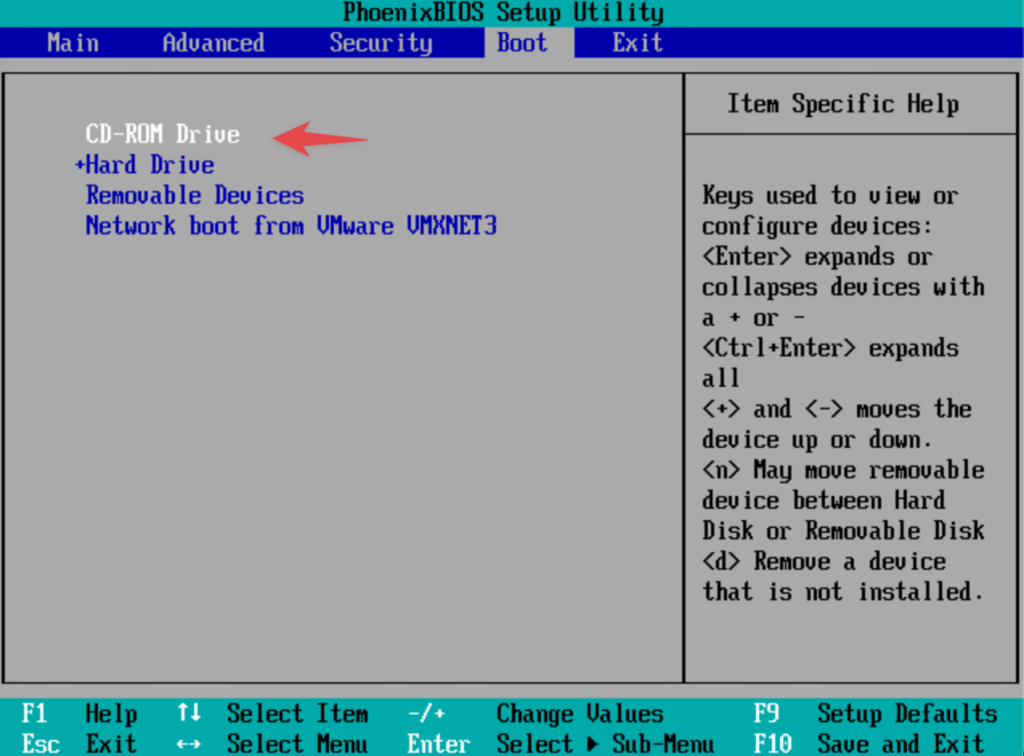
Cho đĩa vào và ưu tiên boot từ CD.
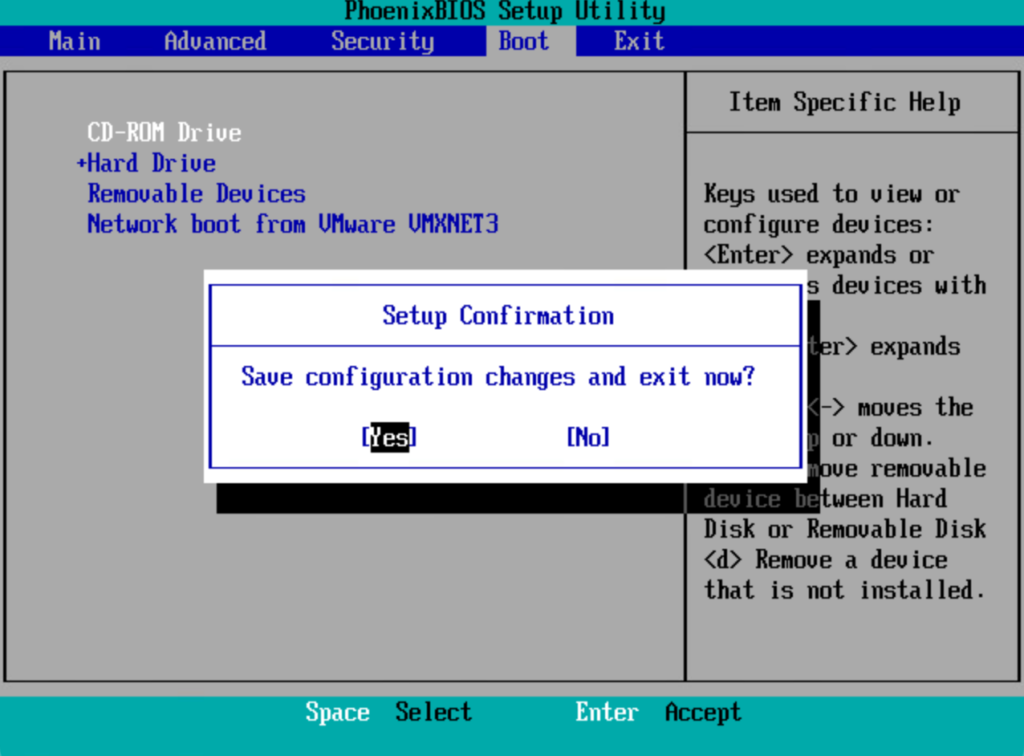
Lưu lại BIOS.
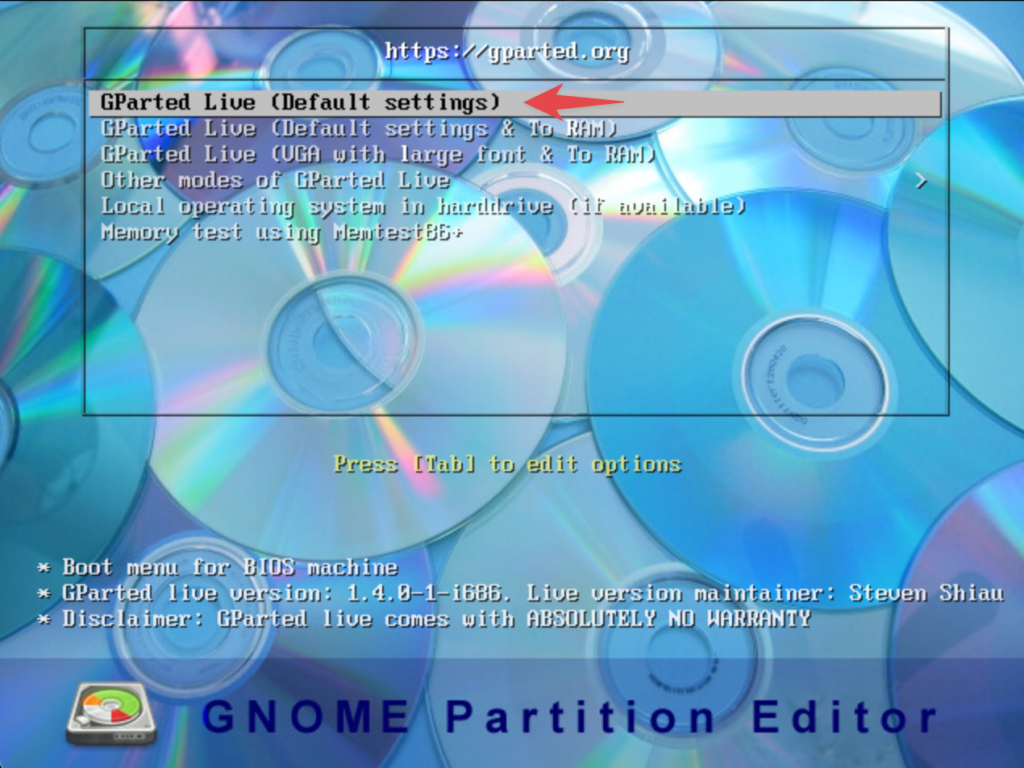
Sao khi boot vào CD hãy lựa chọn GParted Live (Default settings).
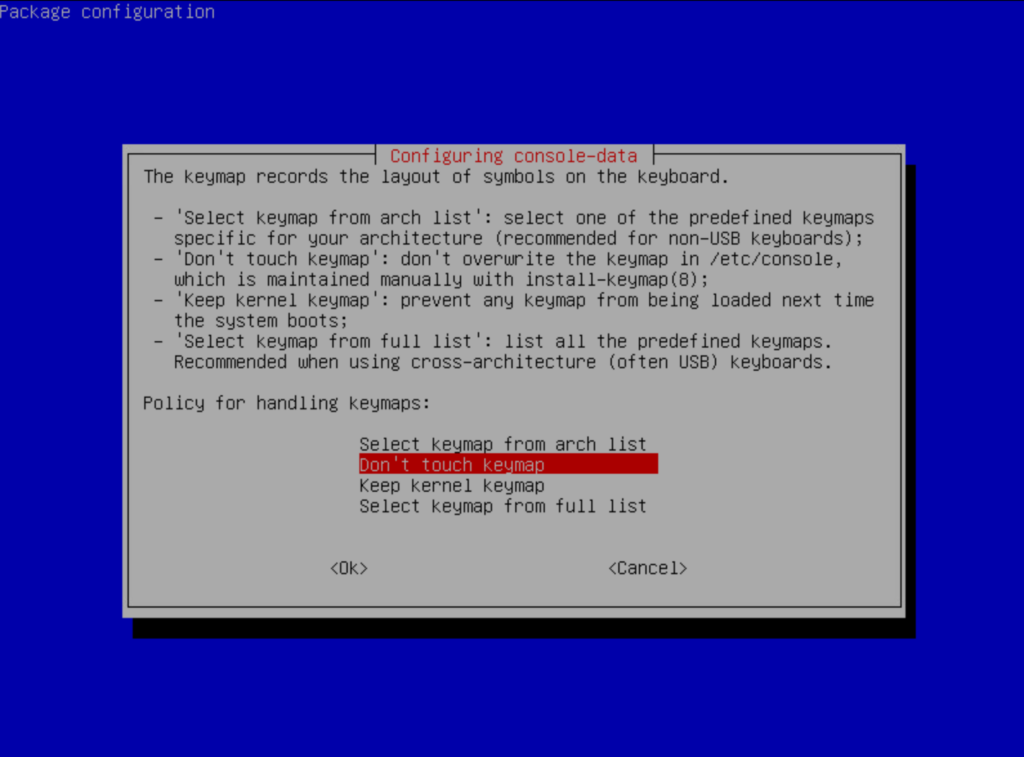
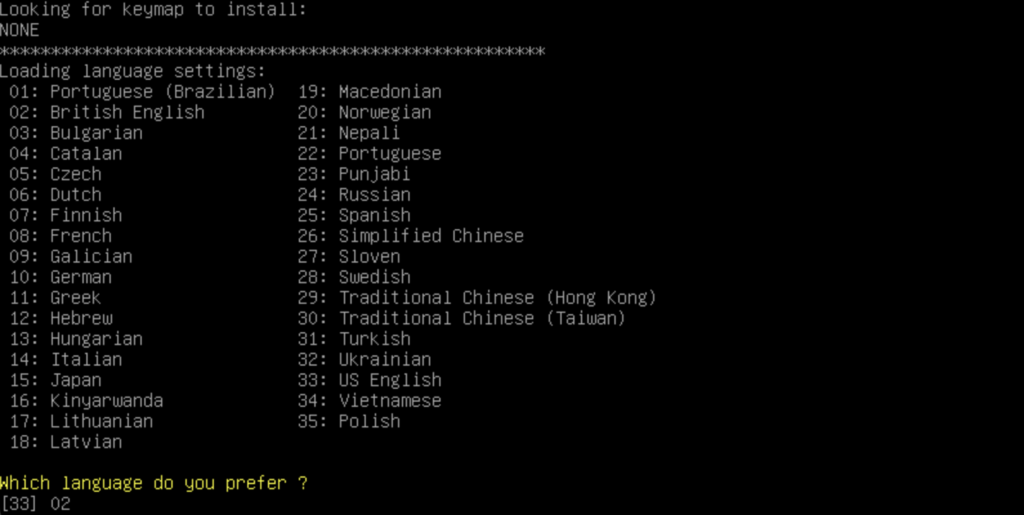
Lựa chọn Don’t touch keymap.
Lựa ngọn ngôn ngữ, mình chọn 02 British English.
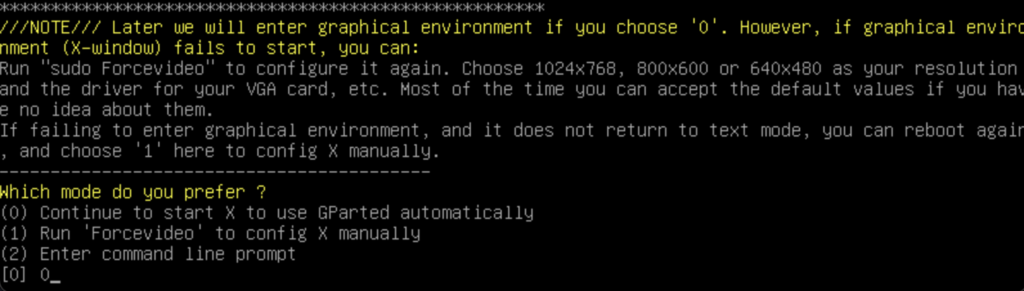
Lựa chọn 0 để chọn mode đồ hoạ Continue to start X to use GParted automatically.
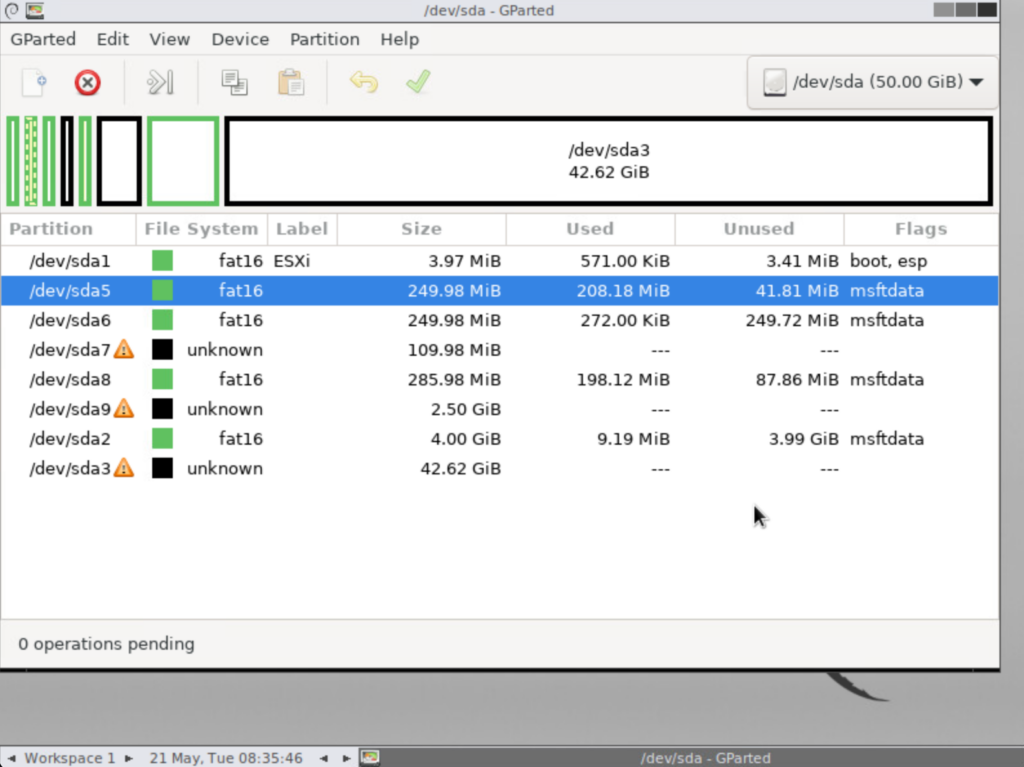
Sau khi boot vào giao diện bạn để ý phân vùng chứa hệ điều hành thường là phân vùng lớn nhất, mình xác định là /dev/sda5.
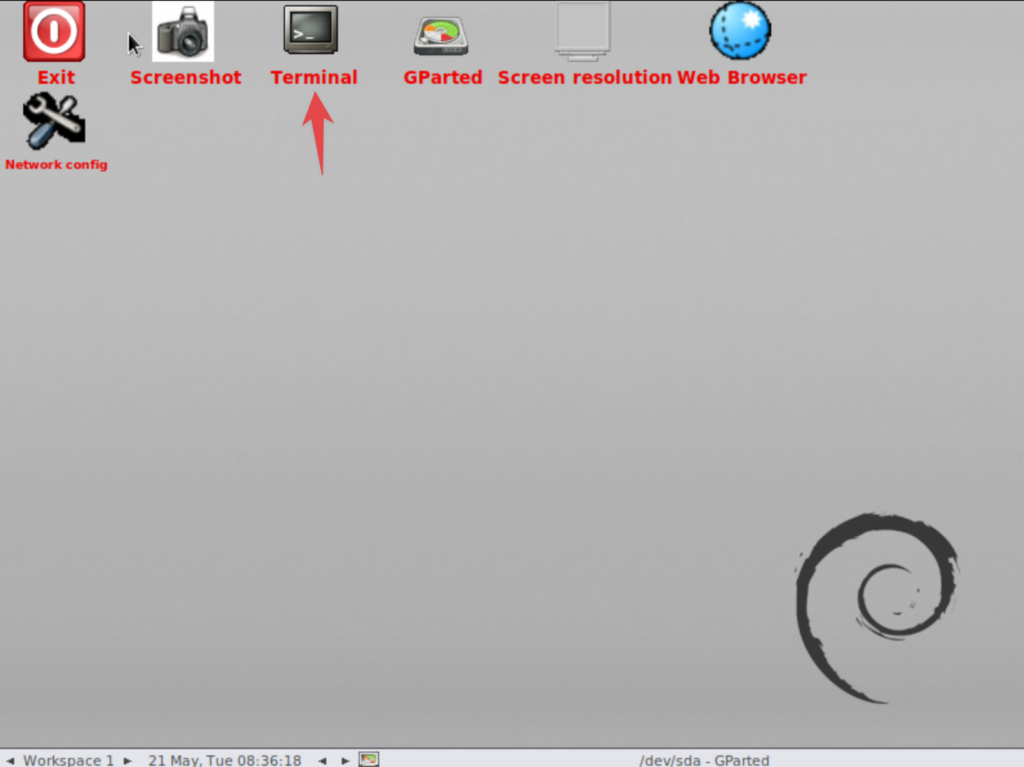
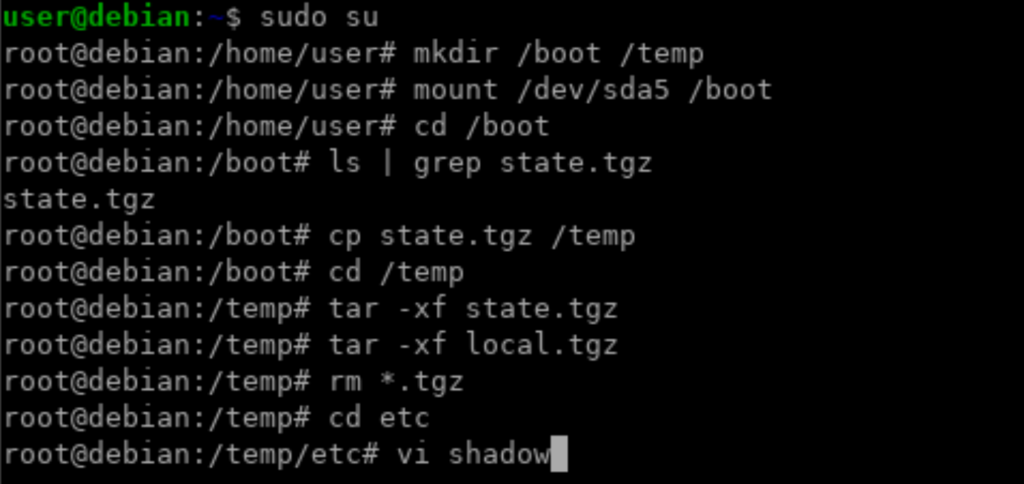
Hãy vào Terminal.
Tại đây hãy gõ các lệnh như dưới.
sudo su
mkdir /boot /temp
mount /dev/sda5 /boot
cd /boot
ls | grep state.tgz
cp state.tgz /temp
cd /temp
tar -xf state.tgz
tar -xf local.tgz
rm *.tgz
cd etc
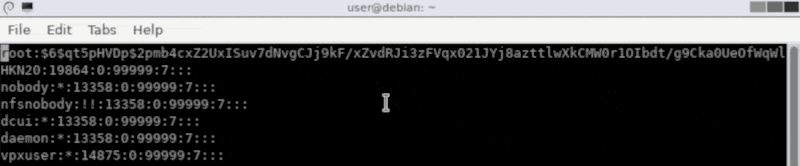
vi shadowHãy xem hình ảnh để trực quan hơn.
Tại file shadow hãy xoá phần hash password và lưu lại.
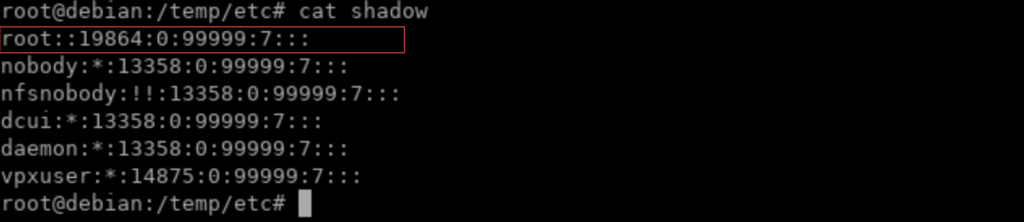
Verify lại file shadow để chắc chắn bạn đã thay đổi và lưu file thành công.
Tiếp tục gõ các lệnh sau.
cd ..
tar -cf local.tgz etc/
tar -cf state.tgz local.tgz
mv state.tgz /boot
reboot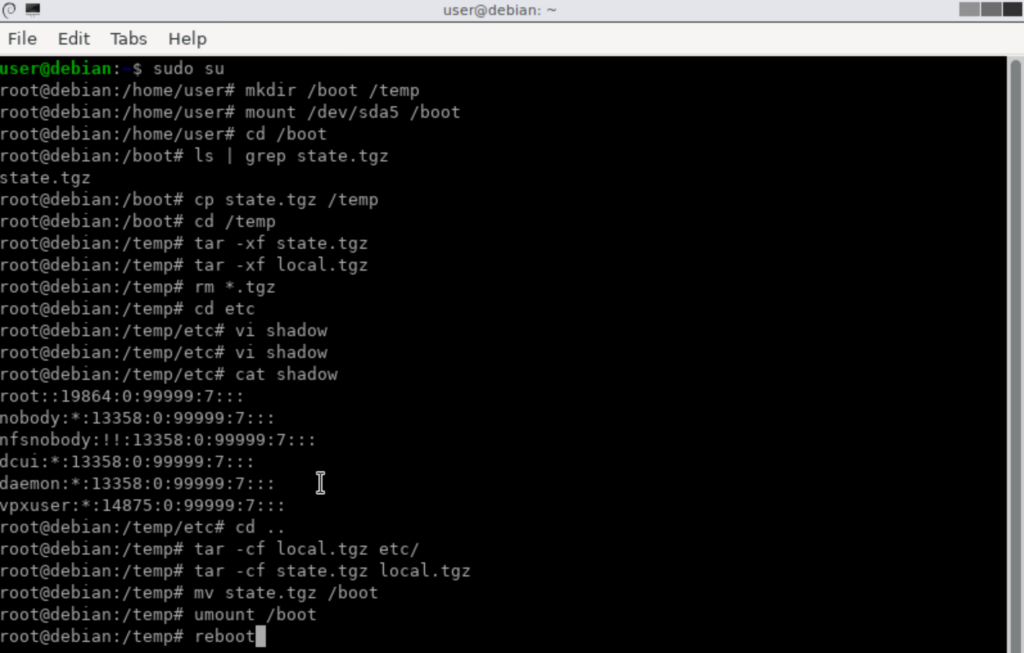
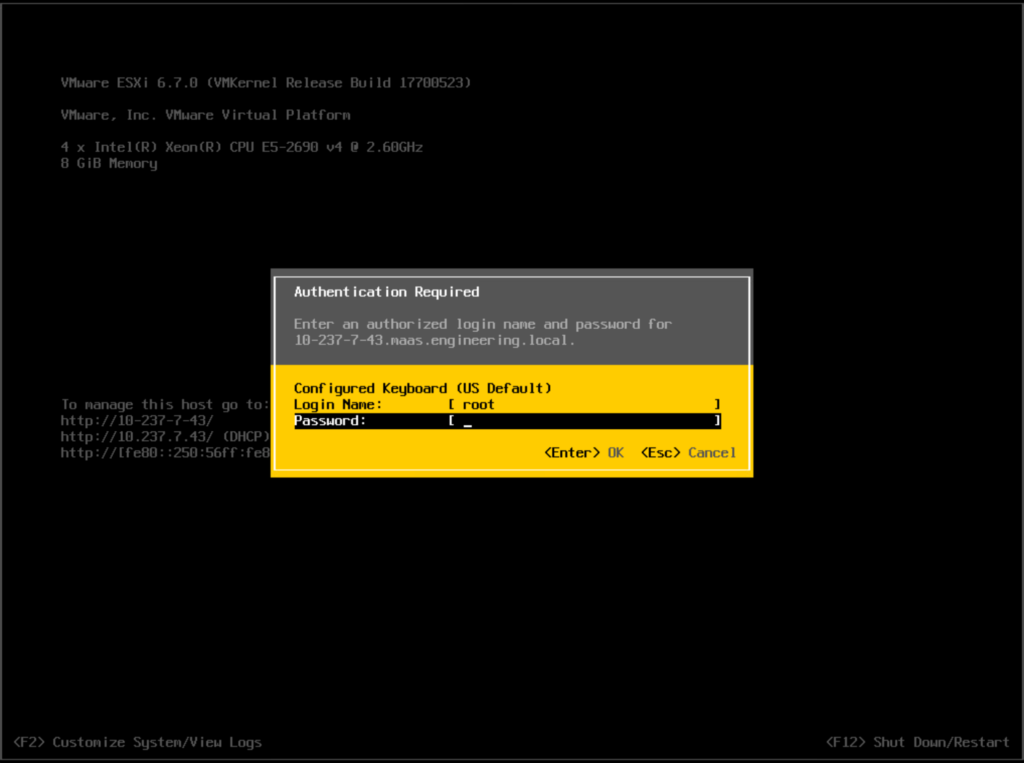
Sau khi khởi động lại, bạn hãy nhập username là root và password để trống, bấm enter.
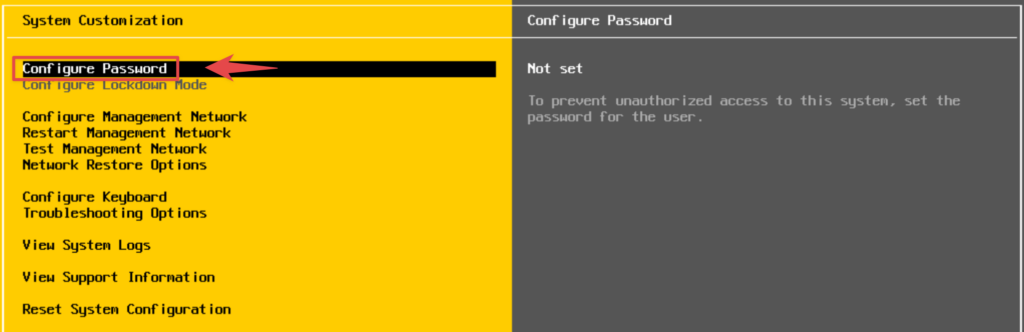
Vào phần Configure Password để đặt lại mật khẩu.
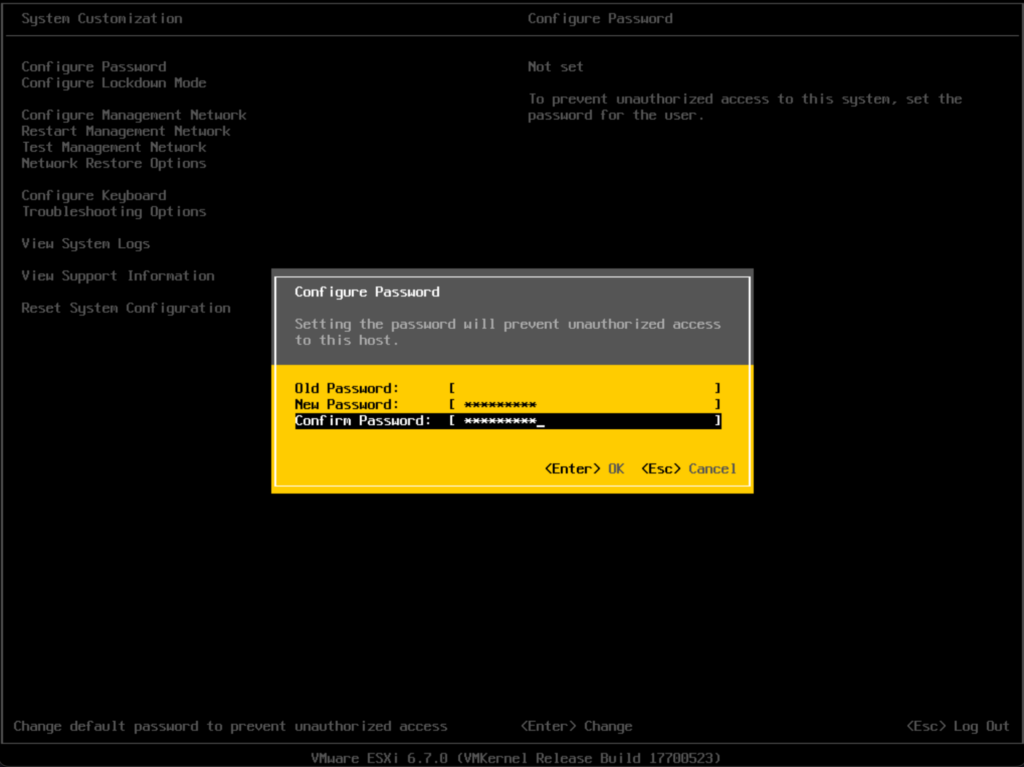
Phần Old Password hãy để trống nhé.
Chúc bạn thành công.
